

This trouble-shooting page can be used to help resolve common questions related to Banner 9 Self-Service." to "These FAQs can be used to help resolve common questions related to various technology services.
The Office of Technology Services is aware that some members of the university community are receiving the following error message when they first try to log into the new portal: "The requested resource was not found. https://my.iit.edu/cp/home/check/pre)"
To remedy this error message, you will need to clear your web browser's cache, cookies, and history. Below you will find step-by-step instructions on how to do this based upon which mobile and desktop browsers you are using when you attempt to login.
Mobile Browsers
I. Android
- The steps to clear your cache, cookies, and history may differ depending on the model of your Android device and your preferred browser. However, you should be able to clear your cache and data from your application-management settings menu:
- Go to Settings and choose Apps or Application Manager.
- Swipe to the All tab.
- In the list of installed apps, find and tap your web browser.
- Tap Clear Data and then Clear Cache.
- Exit/quit all browser windows and reopen the browser.
A. Chrome for Android
- Tap Chrome Menu > Settings.
- Tap (Advanced) Privacy.
- From the "Time Range" drop-down menu, select All Time.
- Check cookies, site data, cached images, and files.
- Tap Clear Data.
- Exit/quit all browser windows and reopen the browser.
II. iOS
A. Safari for iOS
- Open your Settings app.
- Tap Safari.
- Tap Clear History and Website Data and Confirm.
- Exit/quit all browser windows and reopen the browser.
B. Chrome for iOS
- Tap Chrome Menu > Settings.
- Tap Privacy.
- Tap Clear Browsing Data.
- Choose the data type you want to clear.
- Tap Clear Browsing Data.
- Exit/quit all browser windows and reopen the browser.
Desktop Browsers
I. Chrome
- In the browser bar, enter: chrome://settings/clearBrowserData.
- At the top of the "Clear Browsing Data" window, click Advanced.
- Select the following:
- Browsing history;
- Download history;
- Cookies and other site data; and
- Cached images and files.
- From the Time Range drop-down menu, you can choose the period of time for which you want to clear cached information. To clear your entire cache, select All Time.
- Click Clear Data.
- Exit/quit all browser windows and reopen the browser.
II. Firefox
- From the History Menu, select Clear Recent History. If the menu bar is hidden, press Alt to make it visible.
- From the Time Range to Clear drop-down menu, select the desired range; to clear your entire cache, select Everything.
- Next to Details, click the down arrow to choose which elements of the history to clear; to clear your entire cache, select all items.
- Click Clear Now.
- Exit/quit all browser windows and reopen the browser.
III. Microsoft Edge
- In the top right corner of the screen, click the Hub icon (looks like star with three horizontal lines).
- Click the History icon (looks like a clock), and then select Clear All History.
- Select Browsing History, then Cookies and Saved Website Data, and then Cached Data and Files.
- Click Clear.
- After the "All Clear!" message appears, exit/quit all browser windows and reopen the browser.
IV. Internet Explorer 11
(Note: On January 12, 2016, Microsoft ended support for Internet Explorer versions prior to version 11 . UITS strongly recommends that you upgrade to a new operating system if your current system does not support Internet Explorer 11.)
- Select Tools > Safety > Delete browsing history....If the menu bar is hidden, press Alt to make it visible.
- Deselect Preserve Favorites Website Data, and select:
- Temporary Internet Files or Temporary Internet Files and Website Files;
- Cookies or Cookies and Website Data; and
- History.
- Click Delete. You will see a confirmation at the bottom of the window when the process is complete.
- Exit/quit all browser windows and reopen the browser.
V. Opera
- From the Opera menu, select Settings, then Privacy & Security, and then Clear Browsing Data....
- In the dialog box that opens, from the Obliterate the Following Items from the drop-down menu, select The Beginning of Time.
- Select the following:
- Browsing History;
- Download History;
- Cookies and Other Site Data;
- Cached Images and Files.
- Click Clear Browsing Data.
- Exit/quit all browser windows and reopen the browser.
VI. Safari 8 and later
- From the Safari menu, select Clear History... or Clear History and Website Data....
- Select the desired time range, and then click Clear History.
- Go to Safari > Quit Safari or press Command-Q to exit the browser completely.
NOTES:
- Clearing your web browser's cache, cookies, and history may remove some data that you wish to keep.
- For desktop browsers, to quickly open menus used to clear your cache, cookies, and history, ensure that the browser is open and selected, and press Ctrl-Shift-Delete (Windows) or Command-Shift-Delete (Mac). If this doesn't work, follow the appropriate instructions below.
- If the instructions below don't exactly match what you see, you may need to update your web browser to the latest version.
- If you don't see instructions below for your specific version or browser, search your browser's Help menu for "clear cache." If you're unsure what browser version you're using, select About [browser name] from the Help menu or your browser's menu. In Internet Explorer and Firefox, if you don't see the menu bar, press Alt.
About Cache, Cookies, and History
Clearing your web browser's cache, cookies, and history may remove data such as the following:
- Saved passwords;
- Address bar predictions; and
- Shopping cart contents, etc.
While you should clear your web browser's cache, cookies, and history periodically in order to prevent or resolve performance problems, you may wish to record some of your saved information first.
For information about your web browser's cache, cookies, and history, click on the links below to get to the relevant Wikipedia pages:
Troubleshooting Alternatives
If you need to clear your cache, cookies, and history for troubleshooting purposes, but aren't yet prepared to lose the above-mentioned content, you may wish to consider using a private browsing window in your preferred browser as a temporary solution. For instructions on how to do this, please click on the applicable below-listed link:
- Private Browsing (Firefox)
- Browse in Private with Incognito Mode (Chrome desktop and Android)
- Browse in Private in Microsoft Edge
- Browse privately (Safari)
- Turn Private Browsing on or off on your iPhone, iPad, or iPod touch
Getting an 'Authentication Expired' Error
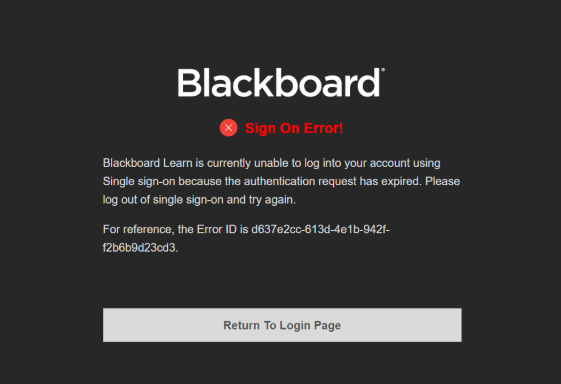
Are you seeing the following message?
When signing into Blackboard, some users report getting an 'authentication expired' error message (see picture below). The error message is preventing users from logging into Blackboard. Even when the user clicks “Return to Login Page” and attempts to sign in again, the error reappears.
Here’s How You Can Address the Issue:
- If you receive this error message, please take the following steps to resolve it:
- Clear your browser’s cache and cookies - Please see the "Clearing Browser Cache and Cookies" section below
- Log out of Access Illinois Tech
- Close your browser
- Reopen your browser
- Log in to Access Illinois Tech and navigate to Blackboard
Clearing Cache and Cookies
To help deal with the difficulties some of our community members are experiencing logging into Blackboard following the deployment of Phase 2 of Access Illinois Tech, you will need to clear your web browser's cache and cookies, close the browser, and then reopen it.
Below you will find step-by-step instructions on how to do this based upon which mobile and desktop browsers you are using when you attempt to log in.
Mobile Browsers
Android
Chrome for Android
- Tap Chrome Menu > Settings.
- Tap Privacy and Security.
- Tap Clear browsing data.
- Tap the Advanced tab.
- From the "Time Range" drop-down menu, select All Time.
- Check Browsing history, Cookies and site data, Cached images and files, and site settings.
- Tap Clear Data.
- Exit/quit all browser windows and then reopen the browser.
Other Browsers for Android
- Go to Settings and choose Apps or Application Manager.
- Swipe to the All tab.
- In the list of installed apps, find and tap your web browser.
- Tap Clear Data and then Clear Cache.
- Exit/quit all browser windows and reopen the browser.
iOS
Safari for iOS
- Open your Settings app.
- Tap Safari.
- Tap Clear History and Website Data and Confirm.
- Exit/quit all browser windows and reopen the browser.
Chrome for iOS
- Click Chrome Menu > Settings.
- Click Privacy and security.
- Click Clear Browsing Data.
- Click the Advanced tab.
- From the "Time Range" drop-down menu, select All Time.
- Check Browsing history, Download history, Cookies and other site data, Cached images and files, Site Settings.
- Click Clear Data.
- Exit/quit all browser windows and then reopen the browser.
Desktop Browsers
Chrome
- Click Chrome Menu > Settings.
- Click Privacy and security.
- Click the Advanced tab
- From the "Time Range" drop-down menu, select All Time.
- Check Browsing history, Download history, Cookies and other site data, Cached images and files and Site Settings.
- Tap Clear Browsing Data.
- Exit/quit all browser windows and then reopen the browser.
Firefox
- From the History Menu, select Clear Recent History. If the menu bar is hidden, press Alt to make it visible.
- From the Time Range to Clear drop-down menu, select the desired range; to clear your entire cache, select Everything.
- Next to Details, click the down arrow to choose which elements of the history to clear; to clear your entire cache, select all items.
- Click Clear Now.
- Exit/quit all browser windows and reopen the browser.
Microsoft Edge
- In the top right corner of the screen, click the Hub icon (looks like star with three horizontal lines).
- Click the History icon (looks like a clock), and then select Clear All History.
- Select Browsing History, then Cookies and Saved Website Data, and then Cached Data and Files.
- Click Clear.
- After the "All Clear!" message appears, exit/quit all browser windows and reopen the browser.
Internet Explorer 11
(Note: On January 12, 2016, Microsoft ended support for Internet Explorer versions prior to version 11. OTS strongly recommends that you upgrade to a new operating system if your current system does not support Internet Explorer 11.)
- Select Tools > Safety > Delete browsing history....If the menu bar is hidden, press Alt to make it visible.
- Deselect Preserve Favorites Website Data, and select:
- Temporary Internet Files or Temporary Internet Files and Website Files;
- Cookies or Cookies and Website Data; and
- History.
- Click Delete. You will see a confirmation at the bottom of the window when the process is complete.
- Exit/quit all browser windows and reopen the browser.
Opera
- From the Opera menu, select Settings, then Privacy & Security, and then Clear Browsing Data....
- In the dialog box that opens, from the Obliterate the Following Items from the drop-down menu, select The Beginning of Time.
- Select the following:
- Browsing History;
- Download History;
- Cookies and Other Site Data;
- Cached Images and Files.
- Click Clear Browsing Data.
- Exit/quit all browser windows and reopen the browser.
Safari 8 and later
- From the Safari menu, select Clear History... or Clear History and Website Data....
- Select the desired time range, and then click Clear History.
- Go to Safari > Quit Safari or press Command-Q to exit the browser completely.
Notes
- Clearing your web browser's cache, cookies, and history may remove some data that you wish to keep.
- For desktop browsers, to quickly open menus used to clear your cache, cookies, and history, ensure that the browser is open and selected, and press Ctrl-Shift-Delete (Windows) or Command-Shift-Delete (Mac). If this doesn't work, follow the appropriate instructions below.
- If the instructions below don't exactly match what you see, you may need to update your web browser to the latest version.
- If you don't see instructions below for your specific version or browser, search your browser's Help menu for "clear cache." If you're unsure what browser version you're using, select About [browser name] from the Help menu or your browser's menu. In Internet Explorer and Firefox, if you don't see the menu bar, press Alt.
About Cache, Cookies, and History
Clearing your web browser's cache, cookies, and history may remove data such as the following:
- Saved passwords;
- Address bar predictions; and
- Shopping cart contents, etc.
While you should clear your web browser's cache, cookies, and history periodically in order to prevent or resolve performance problems, you may wish to record some of your saved information first.
For information about your web browser's cache, cookies, and history, click on the links below to get to the relevant Wikipedia pages:
Troubleshooting Alternatives
If you need to clear your cache, cookies, and history for troubleshooting purposes, but aren't yet prepared to lose the above-mentioned content, you may wish to consider using a private browsing window in your preferred browser as a temporary solution. For instructions on how to do this, please click on the applicable below-listed link:
- Private Browsing (Firefox)
- Browse in Private with Incognito Mode (Chrome desktop and Android)
- Browse in Private in Microsoft Edge
- Browse privately (Safari)
- Turn Private Browsing on or off on your iPhone, iPad, or iPod touch
The Office of Technology Services (OTS) has received questions from our community regarding the storage cap that Google will be imposing on higher-education institutions across the country, including Illinois Tech, transferring content from Google, and the release of Microsoft 365 and OneDrive.
OTS has assembled a list of the most frequently-asked questions and the responses thereto. We do not currently have the answers to all of the questions, but we continue to work to find resolutions.
This compilation of FAQ’s is continuously being updated/revised as new questions and answers arrive.
Frequently Asked Questions (Updated 4-27-23)
The new Google storage limitation
Q1: What is happening?
A: Google has decided to impose a storage cap on higher-education institutions, no longer offering free, unlimited storage. Google’s decision is not directed at Illinois Tech specifically; it is applicable to all colleges/universities. To minimize the impact on Illinois Tech’s operations, individual storage caps will be imposed on faculty, staff, and active students on Sunday, May 7, 2023. Faculty and staff will be capped at 15GB of total storage content; active students will be capped at 5GB. Please take steps now to reduce your storage below these individual quotas
Q2: What content does Google include in their storage-utilization determination?
A: Google includes all content within their Workspace environment, including, but not limited to, Google Drive (i.e., Google Docs, Google Sheets, etc.), Gmail (email), and Google Photo files
Q3: When will the storage cap on the university be imposed?
A: Google’s storage cap imposition date is the end of May. However, to minimize the operational impact on the university, OTS will impose individualized storage caps on active students, faculty, and staff on May 7, 2023; alumni have until April 30, 2023, as previously communicated
Q4: What is Illinois Tech/OTS doing about this?
A: Illinois Tech/OTS have taken/are taking the following steps:
- Illinois Tech has signed a Microsoft 365 (M365) university-wide agreement, which includes 1 terabyte of storage (1TB=1024GB) in OneDrive for each active student, faculty, and staff member.
- Illinois Tech has transitioned the university from a free to a subscription model. Despite that, our university storage consumption exceeds the newly-established allocation from Google, hence, the need to transfer the data to M365 OneDrive.
- Please note that Illinois Tech’s current use of storage must be reduced before the approaching cap-imposition date. Therefore, you are still highly encouraged to transfer your large, non-collaborative, data files from your Drive and Photos to Microsoft’s OneDrive. Google Shared-Drive managers are now able to transfer content to a Microsoft Teams shared drive. Here are the instructions for creating a M365 Teams shared drive. You will need to replicate access permissions and re-add members, as those settings do not transfer when you transfer the content from one platform to another. If you need assistance in moving your Shared-Drive content, please fill out this form and a member of the OTS team will reach out to help you.
- Please do NOT transfer any email content.
Q5: Can we stop Google from implementing the storage cap?
A: No, we do not have the ability to stop Google’s actions; we can only find other solutions.
Q6: Can Google really do this? Don’t we have an agreement of some kind?
A: Unfortunately, yes, Google can do this. Google committed to provide Illinois Tech with email, and they will respect that commitment. However, they never agreed to provide unlimited storage.
Q7: What will be erased from Google Drive? Everything?
A: Google’s cap will not ‘erase’ content from the Drive. Once the individual storage quotas are imposed on May 7, 2023, if your content exceeds 15GB (faculty and staff)/5GB (active students), you will lose your ability to store new or modify existing content until your storage amount falls below your allotted storage quota
In rare, specific cases, when an individual’s Google account has exceeded reasonable storage utilization, OTS will contact that individual and reserves the right, if necessary, to act on their behalf for the greater good of our community, if the individual does not take the action required and reduce their storage.
Q8: Bottom line, what is the impact of Google’s decision on me?
A: The only change is Google limiting our storage utilization; all other Google services will remain the same at this time. When the storage cap limits are enforced on May 7, 2023, your ability to store new or modify content (EXCEPT for email) will be halted. This would negatively impact our operations, hence the below-listed requested actions
Actions to Take Now/Actions Not to Take
Q9: What action should I be taking now?
A: Please delete the content that you no longer want/need from your Google Workspace environment, remaining mindful of Illinois Tech’s Record and Email Retention policyand any content that you may need to retain for the General Counsel’s office.
With Microsoft 365 (M365) available to faculty, staff, and active students, you can transfer your data now to OneDrive (Microsoft’s alternative to Google’s Drive), wherein each such individual will have 1TB of storage. Once you confirm that you have successfully transferred your data to OneDrive, please don't forget to delete that content in Google.
Q10: Can I transfer google "shared drive" content To m365?
A: Yes, this has now been enabled. Here are the instructions to create a Microsoft Teams shared drive. You will need to replicate access permissions and re-add members, as those settings do not transfer when you transfer the content from Google to M365. If you need assistance in moving your Shared-Drive content, please fill out this form and a member of the OTS team will reach out to help you.
Q11: Do you have a recommended approach for deleting content?
A: Please delete the largest-sized content that you do not need first. To see your Drive content organized in order of descending size, please use this link https://drive.google.com/drive/quota and click on the yellow-highlighted arrow as shown in the image below.

To sort email based on size, please follow these instructions.
Q12: But I have to keep some data for legal purposes. What am I supposed to do?
A: OTS is asking the community to delete data that is no longer needed. If you need to retain content for legal, policy, or professional purposes in accordance with Illinois Tech policy and/or requests from the General Counsel's office, then please do so.
Q13: Should I begin to move my data from Google to Microsoft OneDrive now?
A: Yes, and please don't forget: once you confirm you have successfully transferred your data to OneDrive, delete that content in Google.
Q14: Should I print out everything just to be safe?
A: No, that is not necessary. You will be able to store your information on the M365 platform.
Q15: I have a personal Google account, should I transfer my work files to my personal Google (or other personal account)? Is it okay to transfer the data to the hard drive I have at home?
A: Faculty and Staff - No, please do NOT load professional content into your personal account(s) or keep it on your personal hardware, such as an external hard drive. Such actions will result in work-related data “leaving” Illinois Tech, an action that is unsafe and puts university data at risk. Please use OneDrive as the alternative, and once you confirm that you have successfully transferred your data, please delete that content in Google.
A: Students - You may transfer your Hawk Google content to your personal account(s)/ device(s), should you wish, but as long as you are an active student (not alumni), you will also have access to 1TB of storage in OneDrive. Once you confirm that you have successfully transferred your data, please delete that content in Google.
Microsoft OneDrive and Transferring Google Data
Q16: How much storage will I have in Microsoft OneDrive?
A: 1TB per active student (not alumni), faculty, and staff.
Q17: How will I know when it’s time to transfer my data to Microsoft OneDrive?
A: The Microsoft environment, including OneDrive, is now. Please see the OTS Microsoft 365 webpage for more information on the resources currently available on our M365 platform.
Q18: How should I transfer my data once M365's OneDrive is available?
A: We have provided information on how to transfer data on the OTS website. The OTS Support Desk can also assist you if you have any questions. If you would like guidance on how to transfer your Google “Shared Drive” content to the M365 Teams’ shared drive, please see these instructions. If you experience difficulties in migrating the Shared Drive content that is related to university business (only), please fill out this form and a member of the OTS team will reach out and help you
Q19: Do I have to take all of my data out of Google?
A: No, however, since Illinois Tech must reduce the university’s overall storage allocation, OTS recommends that every member of our community conducts a thorough evaluation of their data to ensure only relevant items are retained in the Google Workspace environment
Q20: Do I need to move content that is under my control from the Google Shared Drive?
A: Yes, this content counts against the university’s total storage allocation and will impact our ability to operate efficiently. If you are the manager of a Google “Shared Drive,” please see these instructions to create a Microsoft Teams shared drive. If you need assistance in moving your Shared-Drive content, please fill out this form and a member of the OTS team will reach out to help you
Please keep in mind the following important points:
- OTS has confirmed that there is no way to transfer the group members or their’ access privileges, therefore you will need to re-add members and assign your participants’ access once you move it to OneDrive.
- If you or your delegated, authorized user deletes content in a Shared Drive, it is gone forever. Per Google policy, no backup or restoration services are available.
Q21: How does Google ‘count’ Shared Drive content?
A: While Google “Shared-Drive” content does not count toward your individual storage allotment, it does count toward Illinois Tech’s overall storage allotment, which is why it is critical to transfer the content out of Google into the M365 Teams environment
Q22: How do I find information on the size of Shared Drives and how do I transfer them?
A: Please see https://drive.google.com/drive/quota for how to determine size and information on how to create a Microsoft Teams shared drive
Q23: Can I transfer my Google emails to M365?
A: No, you cannot. At this time, Gmail will remain the university's primary email environment. Please continue to access your email as you usually do.
Q24: But what if my Gmail alone is over the storage cap?
A: We know that for some community members, their Gmail content exceeds their individual quota. OTS initially suggested to our community that you exclude working on reducing your Gmail storage because the larger concern was the amount of data people had in their Google Drive.
However, Gmail does count toward your individual quota (as well as the university’s overall storage allotment). Therefore, anything you can do to delete unwanted emails or get rid of large attachments that you no longer need so you can stay below your storage cap, would allow you to continue to access all of the Google Workspace applications (not just Gmail, which you would still be able to use if you exceed your individual quota). Taking such action to reduce your Gmail storage would also help Illinois Tech since your Gmail content also counts toward the university’s overall storage allotment and impacts its ability to continue to operate smoothly.
Q25: I have tried using the Google Transfer tool to transfer my data from Google to M365, and it is not helping. What else would you recommend?
A: We have found that Microsoft’s mover.io tool seems to perform better than the Google Transfer tool for moving your individual Google Drive content. (This tool should also work for Unix/Linux and Mac systems.) Please also refer to the OTS website for other transfer-tool options. Whether you are using mover.io tool or another, OTS advises that you check the log following the data transfer to see if any files were not copied, and download those files manually from Google Drive
Q26: Is Illinois Tech getting rid of Google entirely?
A: There are no plans to do so at this time.
Microsoft365 (M365) Applications
Q27: How will I know which M365 applications are/are not available?
A: Please refer to the Microsoft 365 page on the OTS website for the currently available M365 services/applications.
Q28: Will I be able to collaborate with colleagues, students, etc. with M365 like I do in the Google Workspace, such as file sharing, real-time collaboration on drafting/editing documents, etc.?
A: The cloud-based M365 environment has very similar capabilities to the Google environment, offering a variety of collaboration tools, including real-time collaboration. Please refer to the Microsoft 365 webpage.
Regardless, the Google environment is available for your use, and you can select your preferred collaborative environment
Q29: How do we collaborate using OneDrive?
A: OneDrive works in the same way as Google Drive with similar file sharing and real-time collaboration capabilities. Please click on this link for more information on how to collaborate using OneDrive.
In addition to OneDrive, the OTS website lists Microsoft collaboration tools including Teams, Yammer, OneNote, Word, PowerPoint, and Excel. OTS is currently reviewing with our security team a Sharepoint deployment, which we will be launching soon.
Q30: What about the M365 voice-calling and calendar features? Will I get to access those?
A: Neither voice (Phone), Calendar, nor email (Outlook) is enabled. If you already have Outlook and/or Calendar installed on your desktop/laptop, and they synchronize with Google, you may continue to enjoy this setup.
We are continually exploring how to release additional services on the M365 platform.
Please note: In OneDrive there is a global user list that is searchable for sharing documents and finding team members.
Q31: What is the replacement for Google Groups, and how do we share folders and documents with these groups?
A: OTS is currently evaluating options for Google Groups. We will update you once we have more information.
We hope these FAQs have helped to better explain Google’s storage cap, the data transfer, and M365, as well as how we are addressing the situation. If you have any other questions, please contact the OTS Support Desk at supportdesk@iit.edu or 312-567-3375 (on campus x7DESK).
You can transfer files from your Google Drive to another location, such as another cloud provider like Microsoft OneDrive or, if you are a student or alumni (ONLY), you can transfer files to a personal account like Google, e.g. Please note: faculty and staff may not transfer university-business content to a personal account.
Transferring your Google Drive Files to OneDrive or Another Cloud Service
There are several options available to transfer files from Google to another cloud-storage solution. The instructions below describe methods for transferring to Microsoft OneDrive but may be used with other services. Please note: After you transfer your content, you need to delete that content from Google.
Option 1: Transfer files from Google Drive to Onedrive USING MICROSOFT'S MOVER TRANSFER WIZARD (mover.io)
- Go to the Microsoft Mover Transer Wizard (Mover.io) website, click on "Go to Transfer Wizard," click "Sign in with Microsoft," and sign in using your Microsoft user name and password, which is the same as your Illinois Tech username and password.
- Under "Step 1: Select source:"
- Click "Authorize New Connector."
- Select "Authorize" next to "Google Drive (Single User)."
- Enter a name of your choosing (such as "bsmith - GDrive," e.g.) under "Please provide a name for your Google Drive (Single User) connector and any required credentials. Display Name."
- Click "Authorize."
- Under "Choose an account to continue to Move," select your Google account.
- Click "Allow" under "Mover wants to access your Google Account."
- Under "Step 2: Select destination:"
- Click "Authorize New Connector."
- Select "Authorize" next to "OneDrive for Business (Single User)."
- Enter a name of your choosing (such as "bsmith - OneDrive," e.g.) under "please provide a name for your OneDrive for Business (Single User) connector and any required credentials. Display Name."
- Click "Authorize."
- Under "Microsoft Sign in," enter your Illinois Tech email address and press "Enter."
- Enter your Illinois Tech password.
- Under "Step 3: Start transferring:"
- Click "Start Copy."
- A page will appear showing the status of the copy.
- Running shows the number of transfers in progress.
- Complete shows the completed transfers.
- Go into your One Drive and confirm that you have all of your files.
- Google Docs (Sheets, etc) may not copy. If this is the case, you have two choices:
- Keep them in your Google Drive "as is."
- Download them into their Microsoft format (Word, PowerPoint, Excel, etc.) and put them in your OneDrive.
- Once you have confirmed that your files have been successfully copied to OneDrive, please go into your Google Drive and delete those files. Do not delete any Google Docs that you wish to keep in Google.
Option 2: Transfer FILES from Google Drive to OneDrive using Google takeout
- Go to the Google Takeout website, click "Deselect all," click the checkbox on the right side of "Drive," then click "Next Step."
- Select "Add to OneDrive" as the delivery method.
- Scroll down to "Link accounts and create export" and click it.
- You will be asked to log into your Microsoft OneDrive and Google Drive. Please do so and click "Open in OneDrive" after the exporting process ends. You can also go to your OneDrive and view the archived files.
- Once you have confirmed that your files have been successfully transferred to OneDrive, please go into your Google Drive and delete those files. Do not delete any Google Docs that you wish to keep in Google.
Option 3: Transfer FILES from Google Drive to OneDrive with Drive Files to OneDrive App
- Open Google Drive in your browser.
- Click "My Drive" > "More" > "Drive Files to MS OneDrive."
- In the Drive Files to MS OneDrive app, hit "Select files" from the Google Drive button to either choose specific files or everything from Google Drive, then press the "Select target folder to save from OneDrive" button to choose the target folder.
- Press the "Save to OneDrive" button to transfer the Google Drive files to OneDrive.
- Once you have confirmed that your files have been successfully transferred to OneDrive, please go into your Google Drive and delete those files. Do not delete any Google Docs that you wish to keep in Google.
You may receive an error message that some files failed to back up and/or that the declared fragment length does not match the provided number of bytes. If this happens, use Option 4 or 5 below for those files.
Option 4: Download files from Google Drive and Upload to OneDrive
If you do not want to use the above-mentioned options, you can manually move files from Google Drive to OneDrive. Here are the steps:
- Log in to your Google Drive, create a new folder, and then move all your Google Drive files to that folder.
- Right-click the new folder, and select "Download."
- Google Drive will download the new folder containing everything from Google Drive to a zip file. Unzip the file. If you do not unzip the file, you cannot upload it to OneDrive.
- Log into your OneDrive account, then click "Upload" > "Folder."
- Choose the new folder containing all of your Google Drive files, and hit "Upload" to transfer your Google Drive files to OneDrive manually.
- Once you have confirmed that your files have been successfully transferred to OneDrive, please go into your Google Drive and delete those files. Do not delete any Google Docs that you wish to keep in Google.
Please note: This method takes a lot of time. In addition, your Internet's upload bandwidth can impact the speed at which the transfer occurs. Using the Internet on campus will likely be faster.
Option 5: Use Google Drive and OneDrive Desktop Apps
Please ensure you have installed Google Drive for desktop and the OneDrive desktop apps on your computer. Then follow the below-listed steps to migrate files from Google Drive to OneDrive. Please note: If you are using the Windows 10 or Windows 11 operating system, you probably will not need to install OneDrive because it has likely been installed by default.
- Open Google Drive for desktop and the OneDrive app and log in. Both of them will show you a folder, named "My Drive" in Google Drive and OneDrive.
- Choose all files and folders in the My Drive folder, and drag and drop them into the OneDrive folder.
- It will copy files from Google Drive to OneDrive.
- Once you have confirmed that your files have been successfully transferred to OneDrive, please go into your Google Drive and delete those files. Do not delete any Google Docs that you wish to keep in Google.
After you have taken these steps, OneDrive will need to sync the files to its cloud server. This can take a long time, depending on your network connection and upload limit.
Transferring your Gmail, Drive Files, and Other Google Data to a Personal Google Account (Students and Alumni ONLY)
Students and alumni can copy and transfer their Illinois Tech email and My Drive files to a personal Google account. Please note: Faculty and staff should NOT use a personal account for university data. This process takes only a few steps when you use Google’s Transfer Tool.
Access Google's Transfer Tool from your Google Account profile page for your Illinois Tech account.
Important Considerations Before You Begin
Processing Time: If you have a large amount of data, the process may take up to several days to complete, according to Google Support. Once you initiate the transfer or download, you will be able to continue to do your work and even log out. However, the new files may not be available for a period of time. Please plan accordingly.
Storage Amounts: Your personal Google account may be limited to 15GB, subject to change by Google at any time. You may have to do some clean up or purchase more space from Google. To view details on your storage usage, navigate to Google Drive Storage within your Google Drive to see the current amount of storage you are utilizing for your Gmail, Drive, and Photos, etc.
Large Email Messages: The Transfer Tool may have difficulty transferring large emails, e.g., email messages with large attachments. If you receive a transfer error, this could be one of the reasons why. Before you begin the transfer (or if there is an error when doing the transfer and it does not complete), you may want to review large emails and save the attachments in another way or simply delete these messages.
Shared with Me Files: ALL files shared with you will be transferred over as part of the transfer function (unless the document owner has turned off the ability to execute downloads and copies for commenters and viewers). Currently, there is no way to control this. You can reduce the number of files that you will transfer by removing your access to documents that you don't want to transfer. To do this, right-click on the file in Windows or CTRL+click on the file on a Mac, then select the "Share" option. Select the dropdown status to the right of your name and choose the "Remove access" option. Please note: taking this step updates the Last Updated information for the file, but it does not indicate that you edited the file.
Copy and Transfer Your Gmail and Drive Files to a Personal Google Account (Students and Alumni Only)
To transfer your Illinois Tech mail and Google Drive files that you own or are shared with you to a personal Google account, use the Google Transfer Tool available from your Google account dashboard. Again, please note: Faculty and staff should not use a personal account for university data.
The Google Transfer Tool feature will automatically transfer your Illinois Tech Gmail and Drive files and upload them to your personal Google account. If you do not have a personal account, you can create one for free.
Important Note: When you start the process of migrating your Illinois Tech account data to your personal account, please open an incognito/private browsing window or use a different browser than you normally use. This will help to ensure the transfer will start.
Reminder: Please review the above-noted Important Considerations Before You Begin and remember to transfer ownership of any files and folders that should belong to someone else upon your departure from Illinois Tech.
To access the Google Transfer Tool:
- In a private/incognito browser window or different browser than you usually use, log into your Illinois Tech Gmail account.
- Access the tool from myaccount.google.com. Alternatively, from the upper-right corner of the browser window in Google, select the "Google Account" icon, and then select "Manage your Google Account."
- From the home page of myaccount.google.com, select "Start transfer" under "Transfer your content." Then complete these steps:
- Enter a destination account;
- Verify your destination account; and
- Select the content to copy and transfer.
- Please be patient. According to Google Support, the process may take up to several days to complete, particularly if you have a lot of data to transfer. When the transfer is complete, you will receive a confirmation email.
- Once you have confirmed that your files have been successfully transferred, please go into your Google Drive and delete those files. Do not delete any Google Docs that you wish to keep in Google.
For Assistance
If you have any questions or need further assistance, please contact the OTS Support Desk at supportdesk@iit.edu or 312-567-3375 (on campus x7Desk). If you are at the Conviser Law Center, please contact the IT Help Desk at the ITS Help Desk at helpdesk@kentlaw.iit.edu or 312-906-5300 (on campus x65300).
How can I get my visiting friends/family connected?
Click here for instructions.
What is quarantine and why is my device quarantined?
When a device is identified as compromised or missing critical updates, it will be quarantined until the issue is resolved. Please contact the OTS Support Desk to get assistance with any issues and have the device removed from quarantine.
How do I register a device that does not have the ability to browse the web, such as SmartTV, Apple TV, Roku, Fire TV, Google Chromecast or Arduino devices?
Please contact the OTS Support Desk to register your device.
How do I request a static IP address?
The policy for requesting a static IP addresses can be found here.
How can I connect my gaming console to IIT Network?
Connecting game consoles over a wired connection is preferred. If the device supports only WiFi connectivity*, please use IIT-Console. Some game consoles have a web browser and can be registered that way. If not, please contact the OTS Support Desk to register the game console.
*802.11b only game consoles are not supported.
What wireless standards does the IIT network support?
IIT supports 802.11ax(WiFi 6), 802.11ac, 802.11g and 802.11n. IIT no longer supports 802.11a or 802.11b client devices on the network.
What is dual band?
WiFi technology uses two radio bands: 2.4GHz and 5GHz. Devices that only operate in one radio band are single band. Devices that can operate in either radio bands are dual band. For the best experience, OTS recommends the use of dual band devices whenever possible. In general, these wireless adapters are marketed as a/b/g/n, a/g/n, a/b/g/n/ac, ac, ax or WiFi 6.
What type of security does IIT-Secure use?
IIT-Secure provides WPA2-Enterprise authentication using EAP-PEAP/MS-CHAPv2 and AES encryption.
What is Wireless Roaming?
Wireless Roaming allows wireless devices to move from one location to another and still retain the connection without disconnecting. IIT wireless infrastructure supports roaming within the same building.
What is IIT-Console?
IIT-Console is an unencrypted SSID meant for gaming consoles and devices that do not support WPA2-Enterprise; this SSID is supported only in Housing areas.
Are wireless printers supported on IIT wireless infrastructure?
OTS does not support or recommend wireless printing. OTS recommends users connect their printers to a wired port or use an USB cable. Please contact the OTS Support Desk if you need any assistance.
Can I set up my own wireless access point?
Any non-OTS approved wireless access point is considered to be a rogue access point and OTS reserves the right to take action to prevent their negative impact on the IIT wireless infrastructure. Please see the Non-Interference with Technology Infrastructure Policy.
Does OTS support wireless devices that are not capable of WPA2-Enterprise?
In Housing areas, devices that do not support WPA2-Enterprise can be accommodated on the IIT-Console SSID. In Academic areas, please contact the OTS Support Desk.
What do the colors on the wall ports mean?
IIT uses four colors for wall ports: Yellow, Orange, Blue, and Green. Yellow and Orange are used for network ports. Blue and Green are voice ports.
Older cabling may not follow this color scheme and may use different colors.
How can I get a new network port installed?
Please contact the OTS Support Desk to submit a ticket for new installations.
How can I get my existing network port activated?
Please contact the OTS Support Desk to submit a ticket for activating existing network ports. A port activation fee may apply.
How do wired ports in MSV work?
In general, when viewing from the hallway into the room, the ports on the left side wall are network ports. The ports on the right side wall are voice ports.
Exceptions include, but not limited to, room suites and Fowler Hall. In room suites, where there is a separate bedroom, the network ports are only in the first room. The bedroom may only have voice ports. Fowler Hall has different room layouts that do not match other MSV Halls.
Please contact the OTS Support Desk if you have any questions or problems.
What speeds can I expect on the wired network?
Due to the old cabling in MSV we provide 10mbps at half duplex to the rooms. All other locations will negotiate up to 100mbps or 1000mbps.
What if I have a question and I don’t see the answer here?
Please contact the OTS Support Desk with any other questions.
Quick Telephone Tips
Forward Your Office Phone Calls to Your Cell or Home Phone
- Pick up the handset or press the speaker-phone button.
- Dial *2 9 1 10-digit number
For example: *2 9 1 3125551234 - If you hear a ‘stutter’ tone, forwarding action was successful.
Forward Your Office Phone Calls to Another Campus Extension
- Pick up the handset or press the speaker phone button.
- Dial *2 5-digit extension
For example: *2 73700 - If you hear a ‘stutter’ tone, forwarding action was successful.
Disable Forwarding
- Pick up the handset or press the speaker phone button.
- Dial #2
- If you hear a ‘stutter’ tone, the action was successful and call forwarding is no longer in play.
Recommended Browser List for Users of Banner INB Forms
Banner Forms (INB) use your browser and a Java JRE plug-in to display the Banner Forms in an Oracle Java Applet. OTS recommends the following browsers to access Banner INB for optimal performance:
| Browser | Icon | Supported Version |
| Chrome | 78+ | |
| Internet Explorer (not recommended for Banner 9) | 10+ | |
| Firefox ESR(32 bit) | 52+ | |
| Safari | 7+ |
To remove your photo from the Welcome Tab in the new my.iit.edu portal, please follow the below-listed steps.
- Log into the my.iit.edu portal.

- Go to the My Profile channel on the Welcome Tab, then select the gear icon in the top, right-hand corner of the screen, and select Preferences.

- Uncheck the Show Profile Picture box and click Save.

If you have any questions about doing this, on the Mies Campus, please contact the OTS Support Desk at supportdesk@iit.edu, call 312-567-3375 (on campus x7DESK), or stop by the Upper Level of the Galvin Library. On the Downtown Campus, please contact the Help Desk at helpdesk@kentlaw.iit.edu, call 312-906-5300, or stop by Room 540.
Your primary Illinois Tech email address will be the one associated with your Access Illinois Tech account.
Some individuals at the university, however, may have multiple email accounts because they have multiple roles. For example, if you are staff member who also takes classes, you will have both a staff and a student university email address:
- username@iit.edu (staff email)
- username@hawk.iit.edu (student email)
To switch between different email accounts in Gmail, please follow these instructions from Google.
Here is an example of performing this action:
- In the top right corner of the screen, click on your profile photo or email address.
- Click the account you wish to use or click "add another account" to add another email account.
- A new window will open for this account, and you will be able to easily toggle between your accounts by clicking your profile photo in your Google account, just like the example above.
